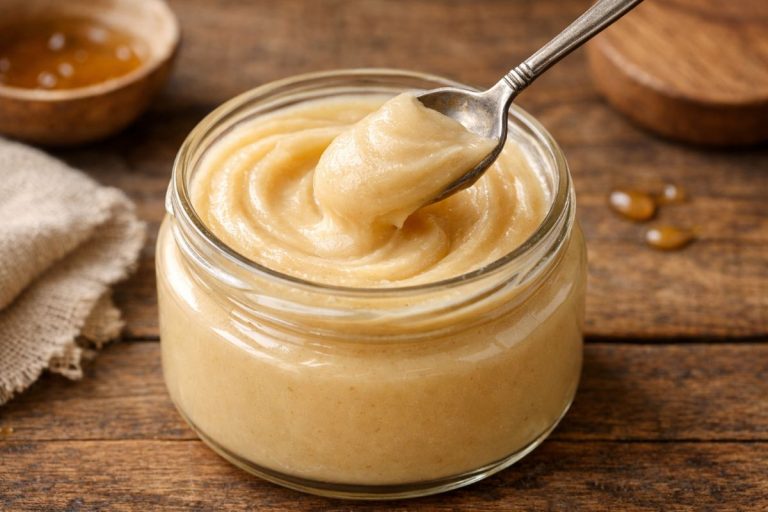
Homemade Pear Jelly recipe
Pear jelly recipe using leftover peels and cores is proof that nothing in the kitchen has to go to waste. With just a few pantry staples, you can transform scraps into a smooth, sweet jelly that sets perfectly every time.
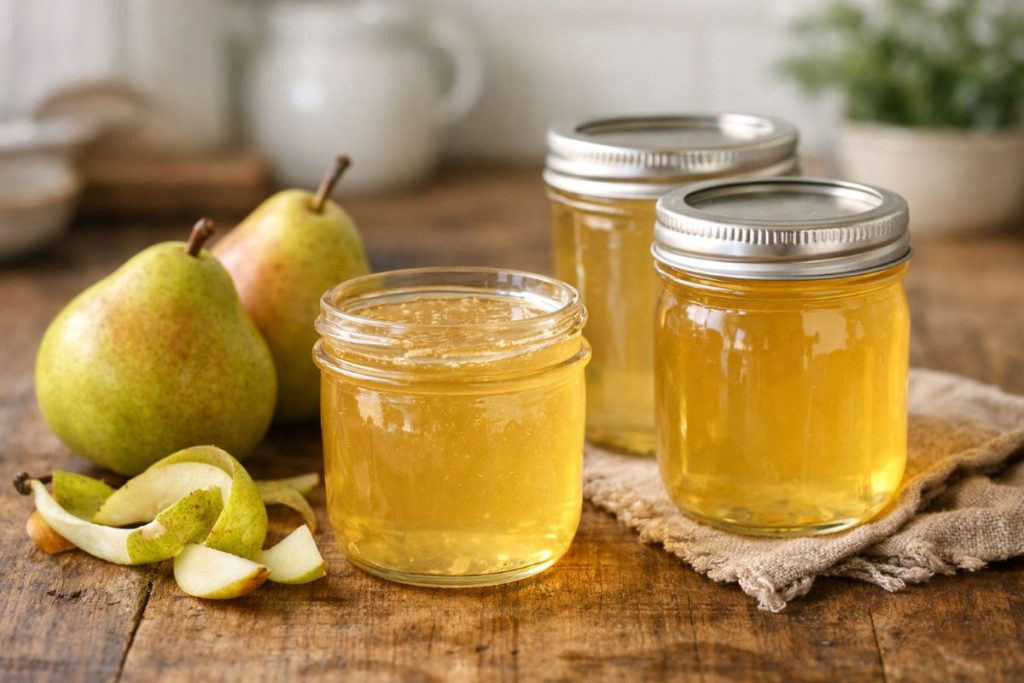
This pear jelly recipe is a simple and practical way to turn leftover pear scraps into something truly useful. By simmering peels and cores, you extract all their natural flavor and transform it into a smooth, lightly sweet jelly that sets beautifully. It’s an easy method that works well for both small and large batches, making it perfect for anyone who wants to reduce waste while still creating something delicious.
What makes this pear jelly canning recipe the best on the internet
- Uses scraps you would normally throw away — true no-waste cooking
- Simple ingredients you probably already have in your kitchen
- Clear, step-by-step method that’s easy to follow
- Reliable set thanks to pectin, so no guessing
- Perfect for making large batches and stocking up
Ingredients
- Pear scraps (peels, cores, stems — about one full grocery bag)
- 8 cups water
- 8 cups pear scrap juice (after straining, for a double batch)
- 2 packages powdered pectin (1.75 oz each)
- 11 cups granulated sugar
How to Make This Pear Jelly Recipe
Alright, so first things first — take all your pear scraps, and yes, that includes the cores and everything, and go ahead and put them into a large pot on the stove.
Now pour in your 8 cups of water. Once that’s in, bring everything up to a boil, then reduce the heat and let it simmer for about one hour. You just want all that flavor to cook out of the peels and cores.
After an hour, go ahead and strain everything. You’re separating the liquid from the solids here, so discard the scraps and keep that juice.
Now measure out your juice. You’re going to need 4 cups for a single batch, but if you’ve got enough like we did, go ahead and double it to 8 cups and pour that into a saucepan.
Bring your juice to a full boil. Once it’s boiling, add in your pectin — that’s your Sure Jell. Stir it in and let it boil for one full minute.
After that, add in your sugar all at once. Stir it around really well so everything dissolves, then bring it back to a boil and let it go for one more minute.
Now take it off the heat.
Carefully ladle the hot jelly into your jars, leaving about half an inch of space at the top. Don’t forget to wipe the rims clean before putting your lids on.
Place your lids on, screw the bands on, and then transfer the jars into a boiling water bath. Process them for 10 minutes.
If you’re working in batches, just repeat the process until all your jars are done.
Once they’re finished, take them out and let them cool completely. You’ll start to see that beautiful jelly set as they sit.
Serving Suggestions
- Spread it over warm toast or biscuits for a simple breakfast
- Serve alongside cheese and crackers for a sweet contrast
- Use it as a glaze for roasted meats like chicken or pork
Storage Tips
- Store sealed jars in a cool, dark place for up to 1 year
- Once opened, keep in the refrigerator and use within 2–3 weeks
- Freezer-friendly: You can freeze jelly in freezer-safe containers (leave space for expansion)
- No reheating needed — just bring to room temperature or use straight from the fridge
More 5-star recipes to try next


Pear Jelly Recipe
Ingredients
Method
- Take all your pear scraps, and yes, that includes the cores and everything, and go ahead and put them into a large pot on the stove.
- Now pour in your 8 cups of water. Once that’s in, bring everything up to a boil, then reduce the heat and let it simmer for about one hour. You just want all that flavor to cook out of the peels and cores.
- After an hour, go ahead and strain everything. You’re separating the liquid from the solids here, so discard the scraps and keep that juice.
- Now measure out your juice. You’re going to need 4 cups for a single batch, but if you’ve got enough like we did, go ahead and double it to 8 cups and pour that into a saucepan.
- Bring your juice to a full boil. Once it’s boiling, add in your pectin — that’s your Sure Jell. Stir it in and let it boil for one full minute.
- After that, add in your sugar all at once. Stir it around really well so everything dissolves, then bring it back to a boil and let it go for one more minute. Then take it off the heat.
- Carefully ladle the hot jelly into your jars, leaving about half an inch of space at the top. Don’t forget to wipe the rims clean before putting your lids on.
- Place your lids on, screw the bands on, and then transfer the jars into a boiling water bath. Process them for 10 minutes. If you’re working in batches, just repeat the process until all your jars are done.
- Once they’re finished, take them out and let them cool completely. You’ll start to see that beautiful jelly set as they sit.